Installation tips and tricks
These are some small tips that are beneficial for first time users of this software, and hopefully will make it more accessible and cause less headache when flashing the board.
We recommend the esptool for flashing .bin files, because it works on all platforms. You can read more about how esptool works on their github page.
For customized versions, we highly recommend using Arduino IDE and our Deauther SDK (see Compiling using Arduino IDE).
Flash Button and espcomm_open error
💥❗️❓❗️❗️💢 Sometimes everything is right but it won’t upload and you may get an error like error: espcomm_open failed.
What you have to do is hold the flash button down, start uploading and only release it when you see that it’s started uploading.
Most development boards feature a auto-reset method and sometimes it doesn’t work properly and it fails to go into flashing mode automatically. To manully force it into the flashing mode, you have to hold down the button.
Drivers and COM Port
In order to upload successfully, you must select the correct COM port. You can think of it as the address with that your computer accesses the ESP8266. The best way to find the correct port is to open the Arduino IDE and see what ports are listed there. This looks the same for every OS, including Linux. On Windows, COM1 is usually never the correct port. On Windows you can also have a look at your device manager, there you can also see if a device is not recognized.
If none of the COM ports work correctly or you can’t find any COM Port, you might need to install the drivers.
The driver you need depends on the UART (USB to Serial) chip that is used on your development board.
Those are the drivers of the most used chips:
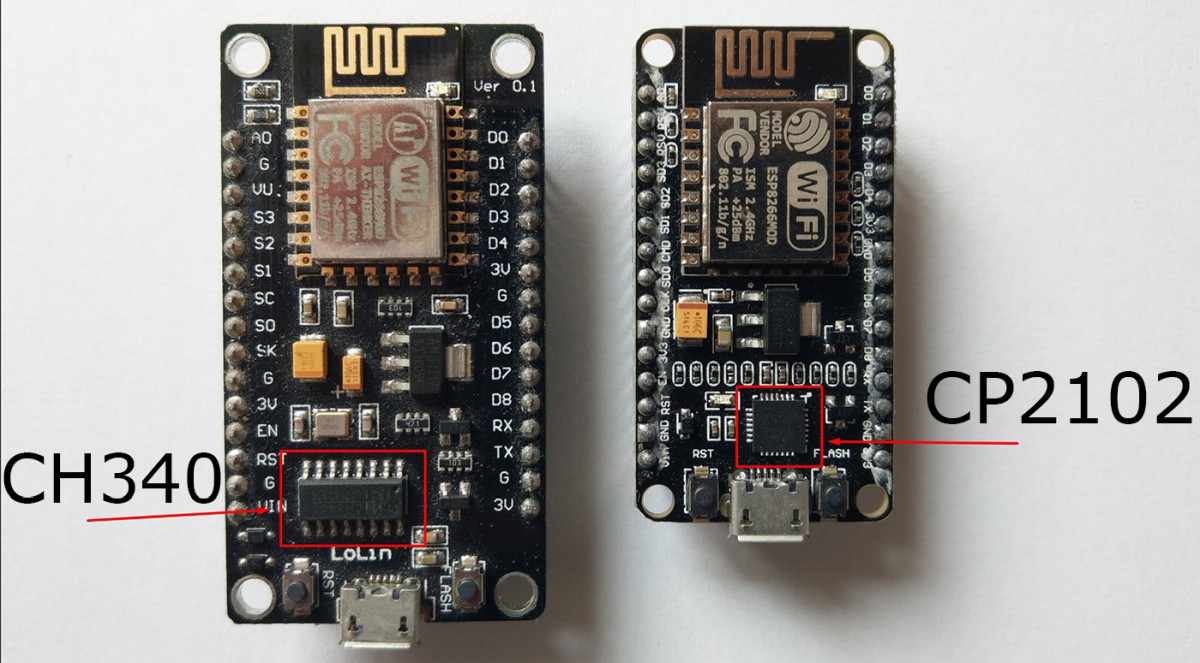
If you’re not sure which chip your board is using, just try both.
If this doesn’t help, try out different cables (some USB cables are only for charging and don’t have data lines) or plug it to a different USB port.